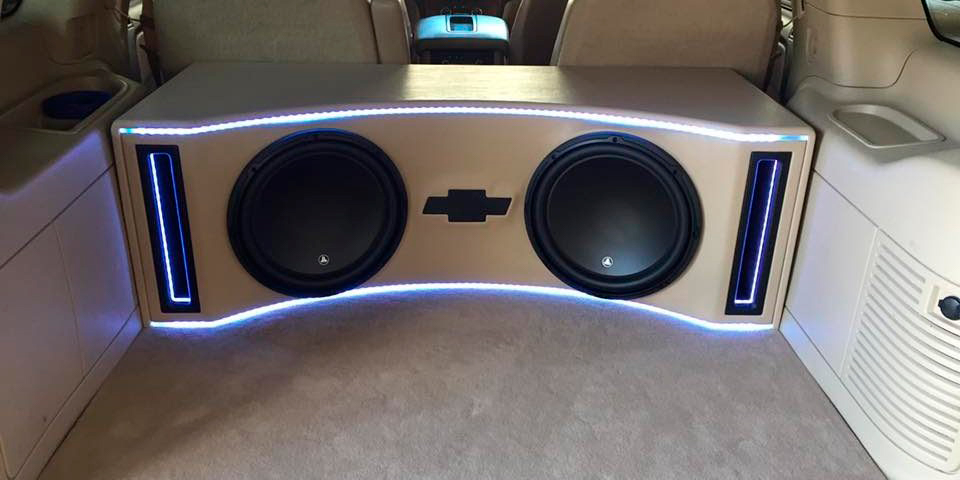
Making a subwoofer box is one of the steps for building a top-notch audio system. Imagine you have bought the best 10-inch subwoofer, but you have no clue how to place it in your house or car. Buying a good-quality enclosure may cost you a fortune, and there is no guarantee that it will have all the features you are looking for. In terms of price, a DIY subwoofer box won’t set you back more than $100.
No special skills are needed to learn how to make a subwoofer box for home or for a car: even a beginner can do that (especially if you have all the necessary tools) if you follow the instructions to the letter. Basically, it’s a simple woodworking project. A properly constructed enclosure will ensure richer bass and improved bass response, as well as extending the life of your subwoofer by preventing damage and over-excursion.
DIY Subwoofer Box Building Guide
Planning is one of the most important things in the whole process. Before you go out and buy the materials, you should have a precise plan of your future box size, look, etc.
Building an enclosure in accordance with the manufacturer’s specifications will make your work simpler and circumspect. They’re usually available on the manufacturer’s website or in the user manual that came with your subwoofer. They include maximum and minimum enclosure size recommendations.
It’s not difficult to guess how to build a subwoofer box to specifications as you have information about all the recommended measurements, but what if, for some reason, the manufacturer of your subwoofer didn’t provide them? Manually taking measurements is an option:
- Depth: measure the depth of the subwoofer and add 2 inches, or more if you are planning to build a larger box.
- Diameter: measure or find out the height and the width of your subwoofer from the manual or from the manufacturer’s website and add a few extra inches as well. Note that if you are going to use the mounting grille, you will need to add more than 2 inches.
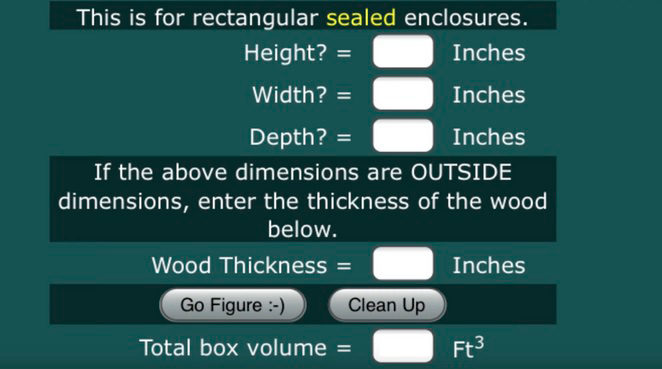
To find out the volume of the future box, you can go to the Basic Car Audio Electronics website and use their calculator that will also help you find out the exact thickness of the wood (1.5 inches is usually a standard for most subs) that will be better to use for your project:
If you are going to build a subwoofer box for a car audio system, you will need to take the measurements (height, depth, and width) of the area where you are planning to place the subwoofer. The shape and the size of the future box will depend exactly on these measurements.
You should also think about whether you want to make a sealed or ported enclosure. The first one gives you a harder bass, while the second one provides a wider range and louder bass.
Materials and tools
- Wood
- Jigsaw
- Drill
- Wood Glue
- Nail gun
- Sander
- Measuring tape or ruler
- Pencil
- Compass
- Rotary saw (not necessary)
- Razor blade
Step #1
The first step of “How to make a subwoofer box” guide is making a sketch of your box to have a visual representation of how it should look. You have to paint where the hole will be made and, of course, write down all the dimensions. This will make your work a lot easier.
Step #2
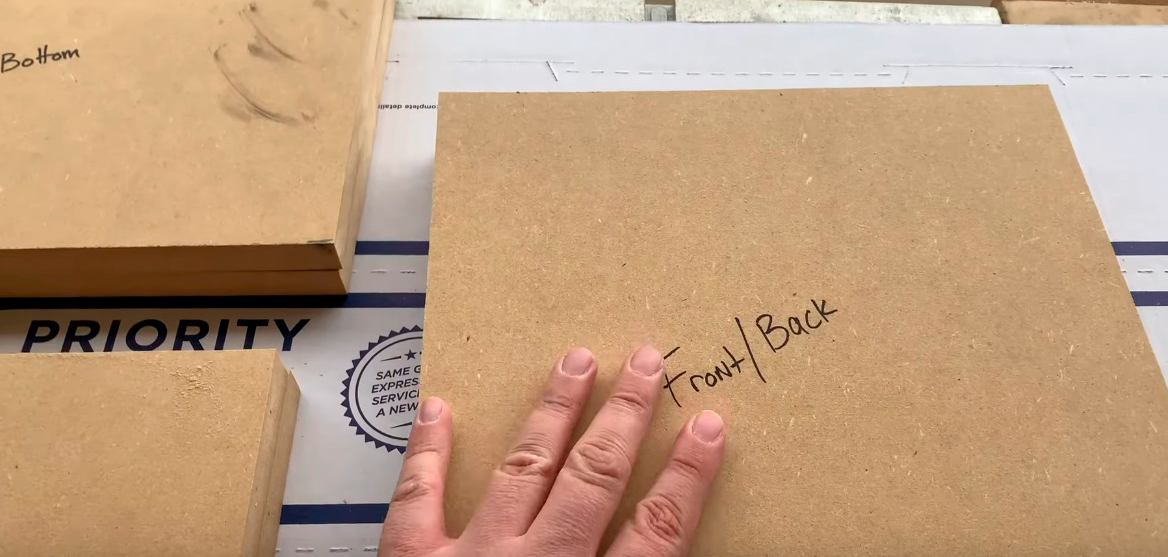
Finally, it’s time to get to work. Start by cutting the wood using a jigsaw according to your plan. Before you start the assembly process, make sure to mark the cut pieces and group them (top/bottom, sides, etc.) for your convenience.
Step #3
Now you have to apply the wood glue to the sides of the wood pieces and put them together (except for the top or the bottom part). Make sure it is distributed evenly (you even can use a small brush for that). You also can use the nail gun to fix the pieces steady while the glue works. You can also use the clamps to achieve a good glue squeeze. Before the glue dries, make sure to wipe the glue residue off the wood pieces.
Step #4
The non-professional jigsaws don’t saw perfectly which may result in some cuts being not completely flush. Fortunately, you can resolve this issue within a few minutes just using a sander (better electric one). After sanding, you can assemble the box by mounting the final wood piece.

Step #5
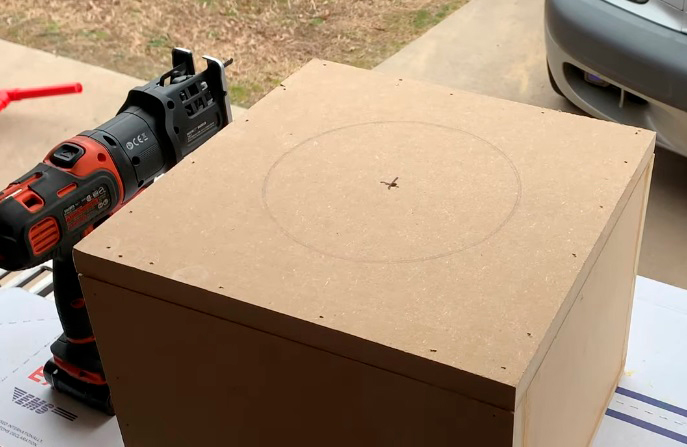
It’s time to drill a mounting hole in the box as you build it. The first thing you need to do for that is locate the center of the box using a measuring tape or a ruler. Some manufacturers, however, include a special template that makes it very easy to make the mounting hole, while others simply list the mounting hole size on their website. Once you’ve found it, take a compass and mark it out. And when the cutout is drawn, it’s very important to remeasure it and make sure that it’s of a perfectly right size.
Step #6
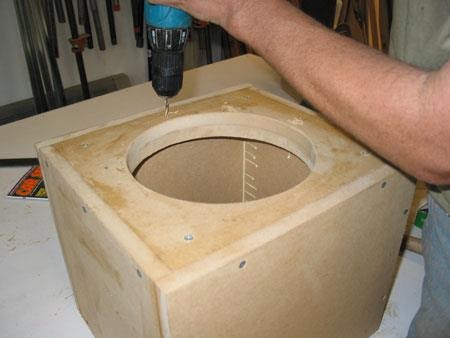
Now, it’s time to start cutting, and this may be the hardest part of the whole process. The best method is to use a tool that has a circle jig (like a rotary saw, for example). However, if you don’t have one, you can also do it using a jigsaw. Of course, the debris won’t let you see where you are cutting, so it’s better to use a vacuum or something like this at the same time. After you’ve finished the cutout, sand it to make it sleek and even.
Step #7
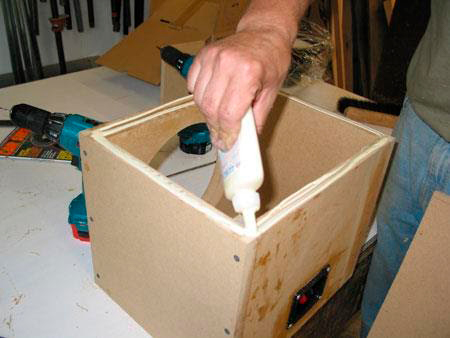
Silicone the inside of the enclosure (in all the places where the wood pieces are attached to each other, such as the sides and corners) to prevent any air leaks.
Step #8
Smooth all the edges on the external part of the box using a sander. This way, you will make the points of contact between the pieces nearly invisible. If you prefer, you can also use a sander to round all of the corners.
Step #9
Finally, you need to make holes for the terminals (use a razor blade for that), fix them on your box, and run the wires through them.
Step #10
You should let the box rest for at least 24 hours before putting the subwoofer inside of it.
The last step is placing your subwoofer inside of the box and screwing it down.
Now, as you know how to build a subwoofer box, you may want to paint the enclosure or cover it with cloth, vinyl, leather, or other material. By doing so, you can make your box look seamless and make it more suitable for the rest of your audio equipment or your car.

Hi everyone! I’m Thomas Moody, also known as Guitarzan.