A MIDI controller is hardware that generates and sends MIDI signals to MIDI-enabled devices There are a lot of types of MIDI controllers: for example, the 88-key MIDI controller, wind controller, drum and percussion controller, etc. In this guide, we’ll show you how to make a DIY MIDI foot controller, which can be used to control guitar amp channels, effect settings, and even the entire guitar rig. Simply put, it can send MIDI commands to software (e.g., track stop/pause).
But, why does it appear that making your own unit is a good idea? To begin with, it will fulfill all of your requirements. Second, it can be built for less than $100, whereas a decent store-bought device will set you back $500–600. And there’s no guarantee that you’ll need all of the features it offers.
There are many guides on the internet, but I wanted to create a simple, easy-to-follow guide that would be useful to non-geeks.
How to Make a MIDI Foot Controller?
Required materials
You’ll need the following items to make your own DIY MIDI foot controller kit. However, depending on what controller you have decided to make, the list may also include the other stuff (an LCD screen, an LED indicator, etc.).
- Arduino microcontroller—This will be the base of your future appliance. Basically, it’s a microcontroller for building digital devices. It must have USB connectivity and support a native MIDI control (so you won’t have to use additional software);
- Controls—You can use plastic/metal or just regular push buttons, switches, etc. Note that metal ones are expensive and noisy;
- Enclosure;
- Wires;
- PCB board;
- Pin headers.
Controller box

Those controllers on the market are typically quite thick and bulky, but the DIY foot controller is a highly customizable device that can be as thin and compact as you need it to be. It can include only a few buttons or more than 10, it’s up to you only.
In terms of enclosure, there are no restrictions. It’s available for purchase or you can make it yourself. The housing can be made of plastic, wood, or metal, depending on your preferences. I would just make sure it isn’t too delicate for the purposes it will be used for.
Electronics
So, here’s how to make a DIY MIDI foot controller step by step:
- To begin, determine how many controls you’ll need, create a layout on your case (ensuring that it can hold them all), and drill the holes for them. The buttons must then be screwed into the housing.
- Then comes wiring, which is the most difficult part of the entire process. Soldering skills are required for this. Bad soldering may create a lot of software bugs that will be almost impossible to fix. I recommend soldering the buttons using the jumper wires. Each button will require two wires (better of a different color; it will be easier to connect them to the microcontroller).
- Before you start soldering wires to the buttons, apply some solder to them. While wiring, make sure that the wires flow in the same direction so that they can be attached to the board more easily.
- Solder your Arduino microcontroller to the PCB board using pin headers. Then, connect it to the buttons.
- Screw on the housing.
The connection diagram based on the Arduino Uno is shown below. You can use it as an example or as an instruction.

There you can see 4 momentary push buttons and 4 stomp box switches. The last ones can be programmed to send quick on and off commands, for example. You also can see the LED indicator, which indicates whether or not the device is plugged in and receiving power. Note that the 5-way selector switch on this diagram should be soldered with 4 resistors (between each of the 5 legs).
Software
This part is about programming your DIY MIDI foot controller kit. When it comes to coding, you have two options depending on your abilities. You can either use pre-written code (with some modifications to suit your needs) or write your own.
To begin, you must download Arduino programming software to your computer. Each Arduino controller has its own unique setup, so make sure to type your model into the browser and download the appropriate installer for your OS.
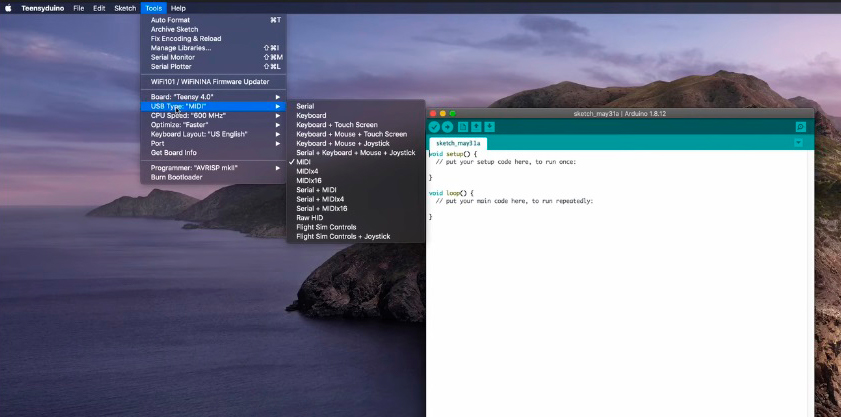
After connecting the controller to the PC via USB cable, you can begin programming it so that it can be used as a MIDI device for any software instrument. Launch the Arduino program and make sure that your device is connected. The option should appear in the “Tools” menu. You should also select MIDI as a USB type in this menu.
Now you must copy the code from your computer and paste it into the program. If you don’t want to write it yourself, don’t worry: there are plenty of codes to choose from on the internet. Select Add file from the list under Sketch in the upper menu. Use your computer to get the code.
All that’s left now is to put the device to the test.
Or you can buy brand new.


Hi everyone! I’m Thomas Moody, also known as Guitarzan.